Setting up ONScripter properly on Mac OS X
This page covers setting up ONScripter properly, which is to say, in a fashion consistent with how Mac OS X usually works. Sure, you can drop the onscripter-en application into the same directory and the resources and that will work. But it doesn't give you that fuzzy feeling that you are using a Mac application, as Mac applications are a single item in Finder.
The procedure will assume you are copying from a Windows ONScripter installation. If you are copying from a proper NScripter installation then things may change a little, but most of the procedure should still apply. If you are copying directly off a game disk then things will vary a little.
Procedure.
Mount the
.dmgfor ONScripter and take a copy of the executable, putting it somewhere easily accessible. I would recommend taking a second copy just so that if you mess up, you can start from the beginning without having to mount the disk image again.On the ONScripter-EN application, right-click (Ctrl-click) and choose Show Package Contents.
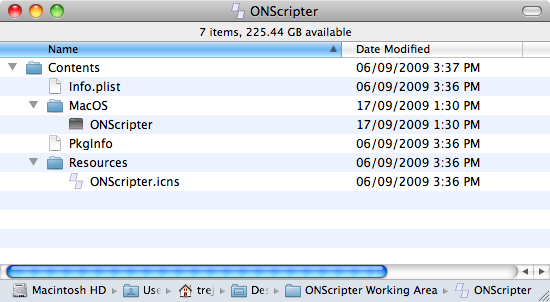
Figure 1. Package contents at start
Open
Contents/Info.plistand change the following values:- Bundle identifier: this can be anything which is unique, but I tend to append some variant of the game name onto the end of the string which is already there. It's important that it isn't the same as any other game, and it's important if you are updating a copy of the same game, that the string doesn't change, as this affects where your savegames end up.
- Bundle name: set this to the name of the game.
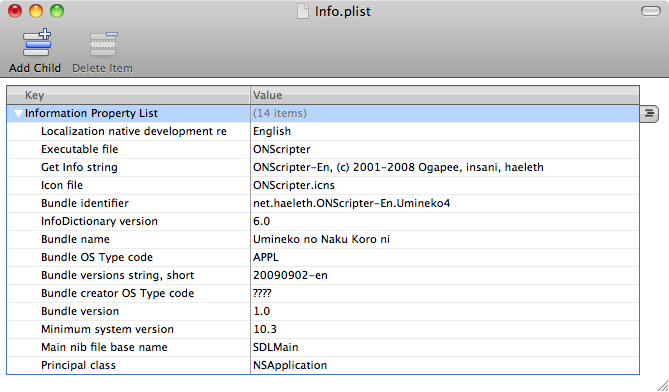
Figure 2. Info plist after editing
Once you're done there you can save and exit.
Optionally, replace the icon.
I like to do this, but my icon skills are awful, and for whatever reason the developers of these games seem to think that 32x32 is an adequate icon size (pro-tip: even on Windows, 256x256 has been the standard size since Vista.) So I tend to crop something from a screenshot or title screen and scale it to work. Unfortunately this doesn't quite give the right effect for Mac OS, where the icon should be transparent in parts, such that it "weighs" about the same as other icons in the dock, but it's better than having the default ONScripter icon.
Once you have your icon, replace
Contents/Resources/ONScripter.icnswith your new icon.Copy require game files into
Resources. This is where you will be copying the resources from the game install. Naively you can assume all files are required. You will end up with some files you don't need:- The Windows icon (
.ico) - The Windows executables (
.exe,.dll) - Any miscellaneous readme files - I tend to leave these in anyway. In some cases there is licence text in these which should probably remain in place.
If you are copying from a CD/DVD and don't know which files are needed, you might find a file on the disk which gives away the correct way to install the game. For Umineko, this was
filelist0.txt- it has a list of directories and their destination directories.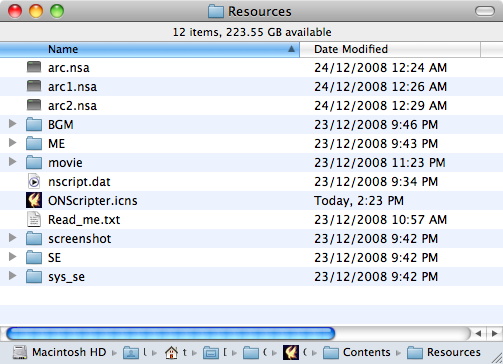
Figure 3. Resources after copying
- The Windows icon (
I will assume at this point that are are also planning to patch the game to English. If you're not, you might need to get
default.ttfand whatever else the game might complain about from some location, and copy it intoResourcesalong with the other files.Unzip the contents of the patch somewhere. I tend to put it into the same working directory I use for the other files.
In Resources, rename
arc.nsatoarc1.nsa. Ifarc1.nsaalready exists, rename it toarc2.nsa, and so on until you come to a number which doesn't exist. Then copy in:* `arc.nsa` - taking the place of the file you just renamed * `nscript.dat` - overwriting the one already in there * `default.ttf` * `GPL.txt` - better to be safe than sorry * `*.doc` - I don't use these and they're not required, but just in case I want to read them later.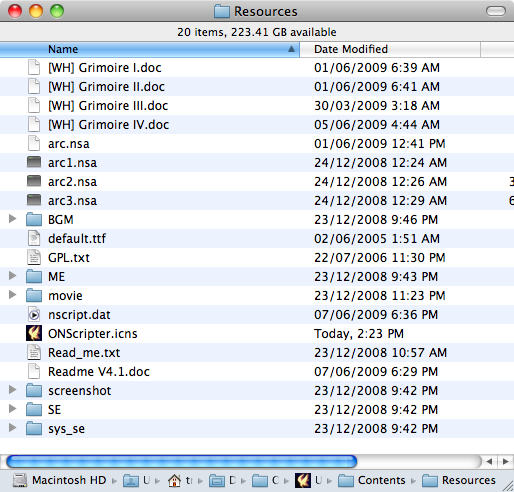
Figure 4. Resources after patching
Finally, go back out into Finder, rename the ONScripter-EN app itself to the name of the game itself.
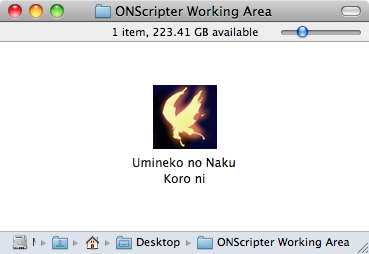
Figure 5. Icon after renaming
And now you are done! Launching the application will now find the resources from inside the app bundle, launching the game normally.
Now if we could just get the majority of translation groups using these instructions instead of telling people to drop the ONScripter application and patch files into the game directory...